Australian Custom-made Shutters 📍17-19 Kembla Street, Cheltenham VIC 3192
How to Assemble / Install
How to Assemble Plantation Shutters
Before You Begin (Assembly)
Read these instructions thoroughly before assembling your shutters.
Understanding the steps before you begin will ensure the assembly process goes smoothly.
Check the packaging box carefully before opening to ensure there is no transport damage.
Check the carton label to confirm the window location of the shutters.
Prepare a clean working space to assemble your frame (preferably in front of the window).
Carefully remove panels and frames from the packaging. Check the packaging label (marked with an “X”) to locate the corresponding hardware.
Do not mix panels or frames from different windows.
Do not dispose of the packaging until installation is complete and the shutters are operating properly.
Assembling the Frame
1.Getting Started
Each side of your frame kit will be labelled as Top, Bottom, Left, or Right on the cutting side of the frame.
Lay the frame pieces on the floor face up. Position the corners of the frame on a flat surface and line up the Hoffman key.
The Hoffman key holds the two corners together and should be inserted with the rounded side facing up and the flat side level with the back of the frame.
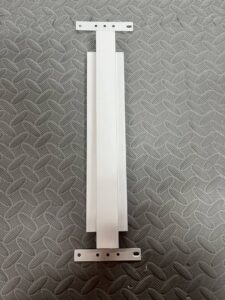
2.T-Post
If your frame kit includes a T-Post, the top (T) and bottom (B) sides will be labelled.
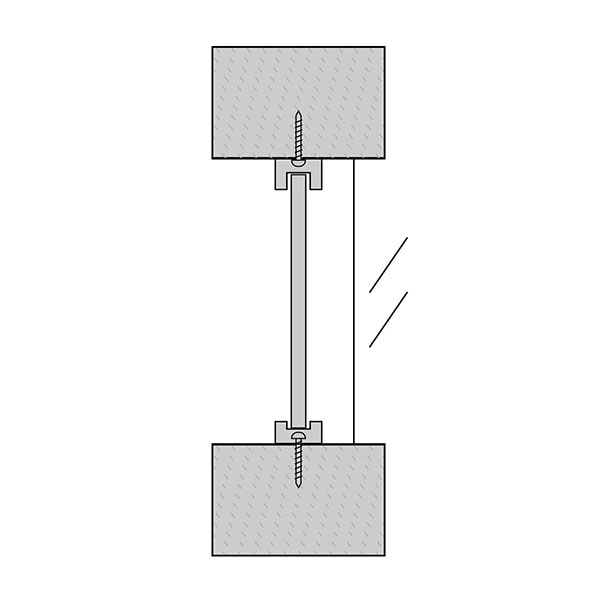
2.1 Install the T-Post Metal Plates
You will find white T-Post metal plates in the spare parts bag.
Attach the metal plate to the pre-drilled holes at the top and bottom of the T-Post.
Ensure the larger hole on the metal plate faces the right-hand side for both the top and bottom.
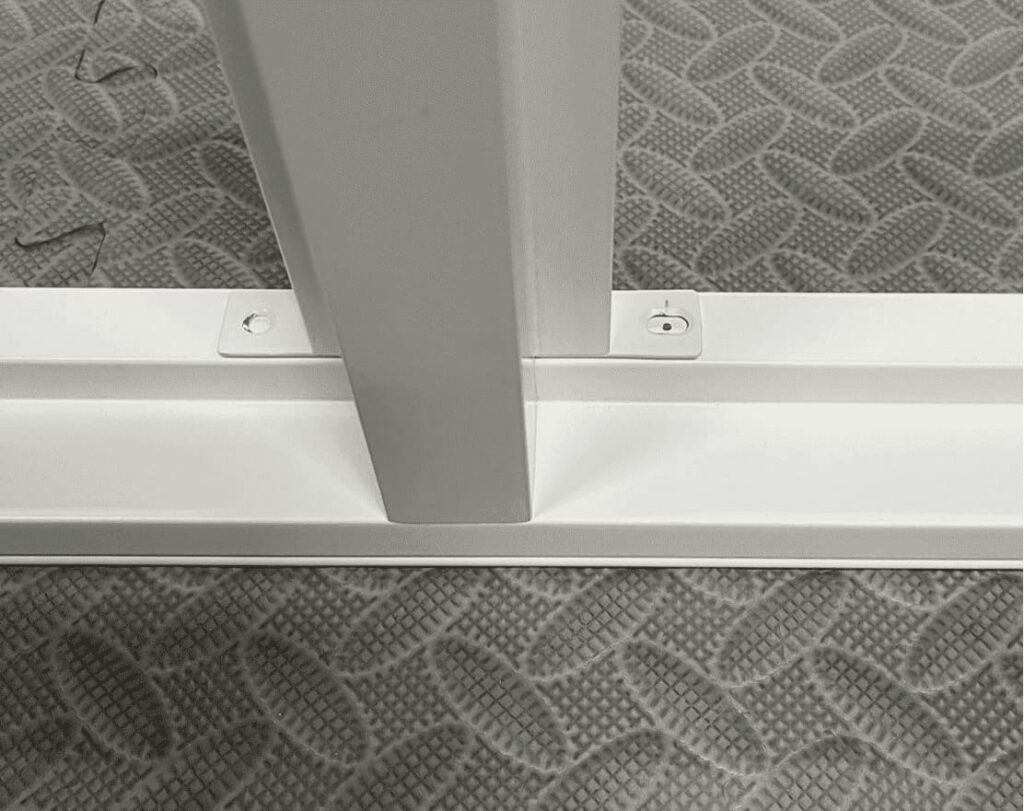
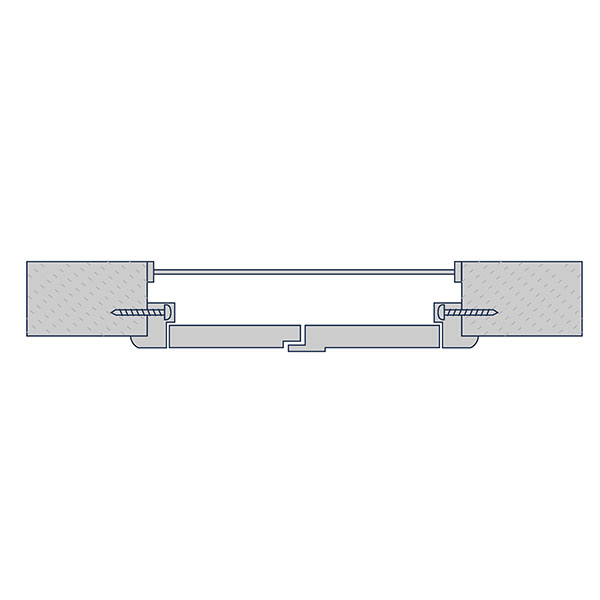
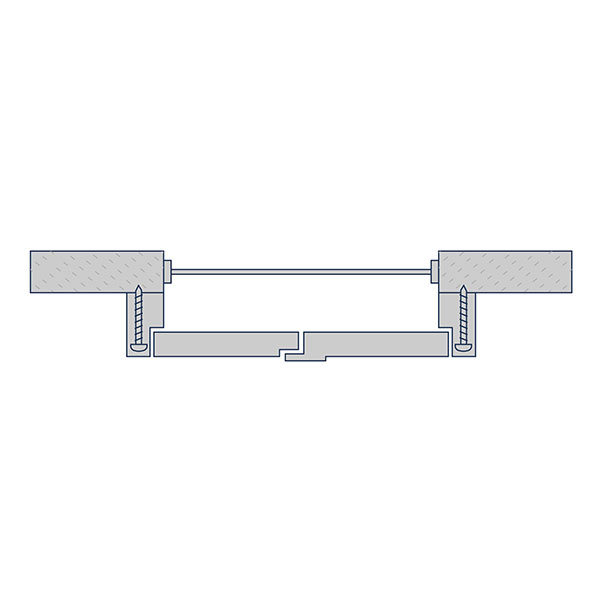
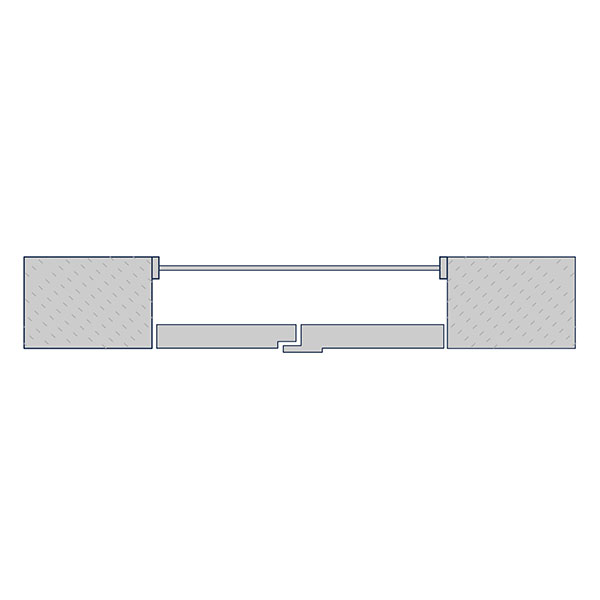
2.2 Attach the T-Post to the Frame
After installing the metal plates, position the T-Post onto the top and bottom frames.
Align the centre of the larger hole on the metal plate with the pre-drilled location hole on the frame.
Adjust slightly if required before tightening the screws on both sides.
ASE recommends that all surfaces be kept clean by prompt removal of all dust, dirt, grime, and any foreign matter using clean water and a small amount of mild detergent. We suggest regular cleaning by wiping down with a damp cloth. Do not use chemical-based cleaning products to clean the shutters. Regular cleaning will keep your shutters looking like new!
1) Dust with a lint-free or microfibre cloth 2) Run a clean and wet cloth across all areas of the shutters. You may clean them with mild dishwashing liquid mixed with water if you think your plantation shutters are looking dirtier than usual 3) Dry with another clean lint-free cloth
Note: Do not use any household cleaners that contain ammonia or chlorine. They will damage your shutters. Use non-household cleaners with soft and non-abrasive cloths for dusting and wiping.
If your shutters are in wet areas such as bathrooms and kitchen, we recommend you clean them every month and be aware of the hinges and magnet areas, as these areas can rust easily and / or corroded if they are not cleaned properly.
The finest window furnishings in Australia, tailored to Australian homes.
Warranty Info
ASE warrants its structure plantation shutters for five (5) years. This warranty is against any defects in material or workmanship and is in addition to any other obligations imposed by law. This warranty does not include freight and installation costs.
This warranty does not cover:
– Abuse or misuse – Everyday wear and tear – Maintenance and care not in accordance with the recommendations listed below – Damage to premises – Use of silicon and chemical-based sprays